How To Install MaxJax Lift in Home Garage – Review, Mods & More
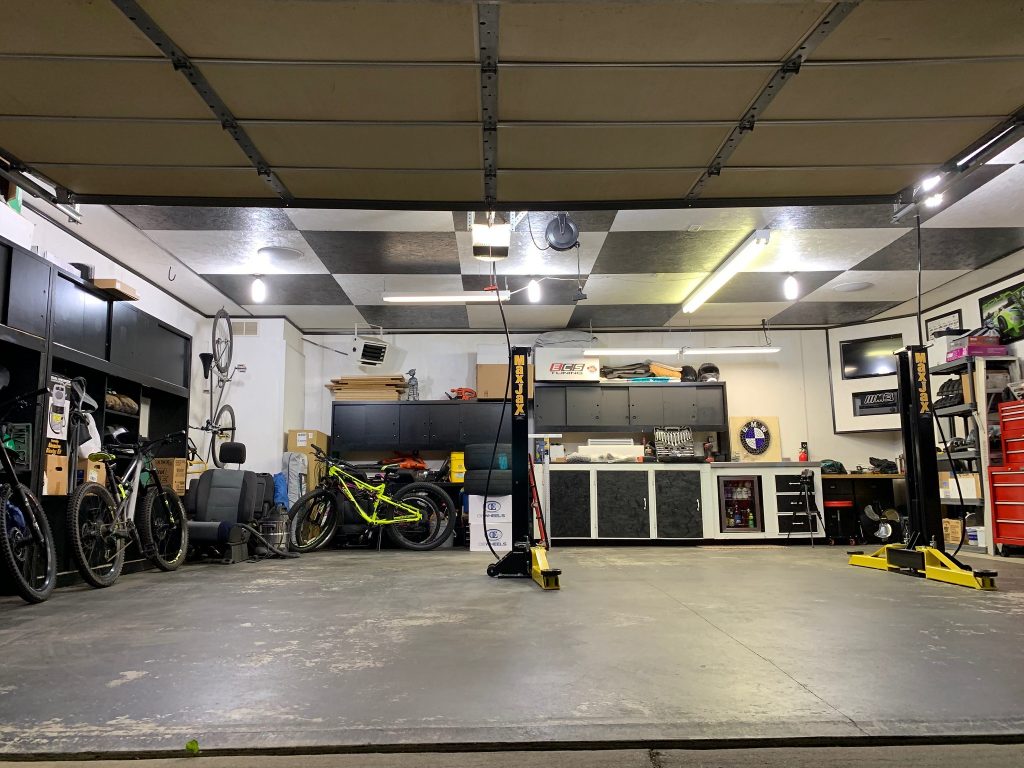
As I continue to work on my own vehicles, I find myself constantly adding things to the garage to optimize my work space. Since buying the house four years ago, I transformed the 750 sq/ft garage into my ultimate hangout space. In my mind, the only thing missing was a lift. Until I found out about the 2-post MaxJax lift system.

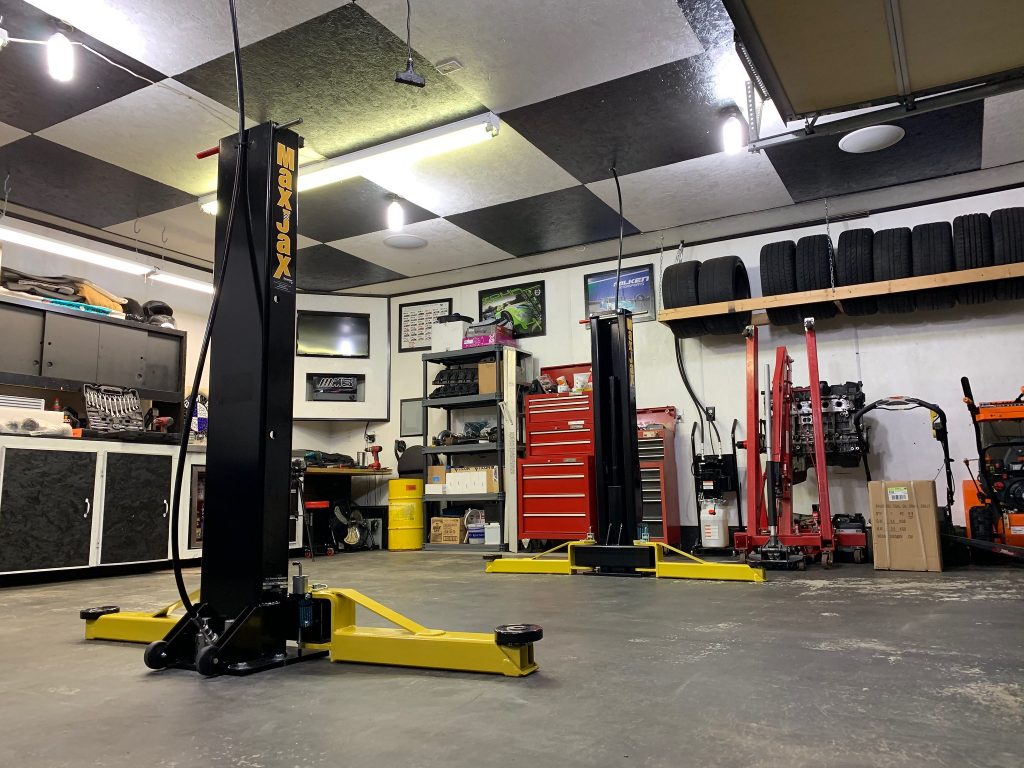
With 8 ft. 7 in. (105″) garage ceilings, my options were limited. I didn’t want a scissor lift or a 4-post lift. All of the 2-post options I could find had a minimum column height of 9 ft. or 10 ft., which wouldn’t fit in my garage without modifying the ceiling. Then I found the MaxJax system which has short, portable columns.
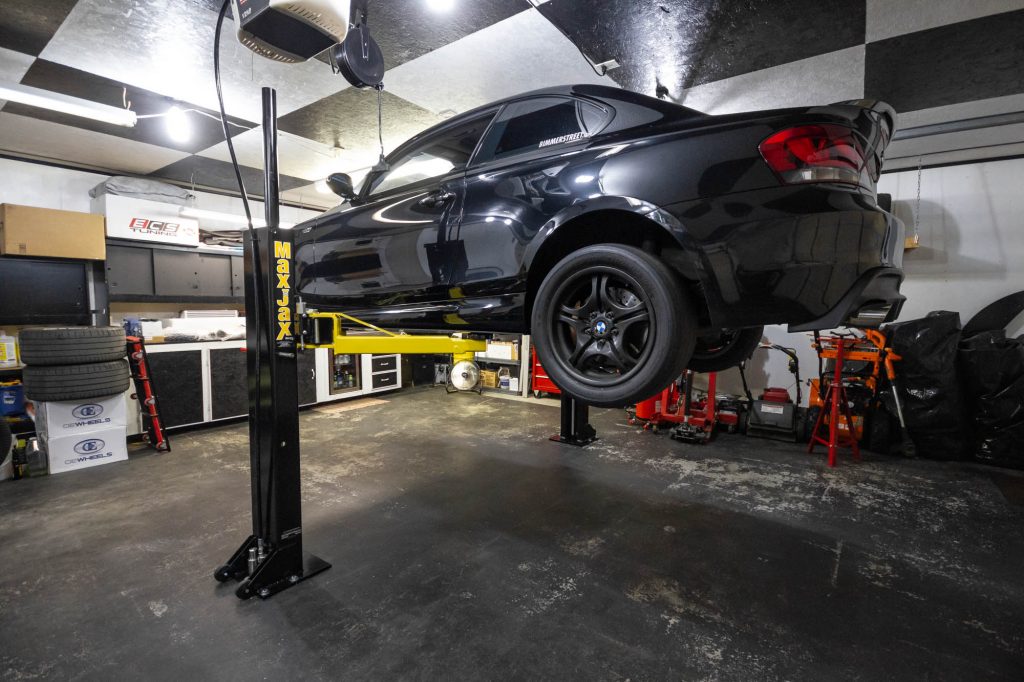
In its highest position, the MaxJax hydraulic cylinders rise up to 89″ with a lift height of 45″ (or 48″ with 3″ adapters)! This allows plenty of clearance between the columns and the ceiling, while offering 4 ft. of working space under the car. The only limitation is the height of whatever vehicle goes on the lift.
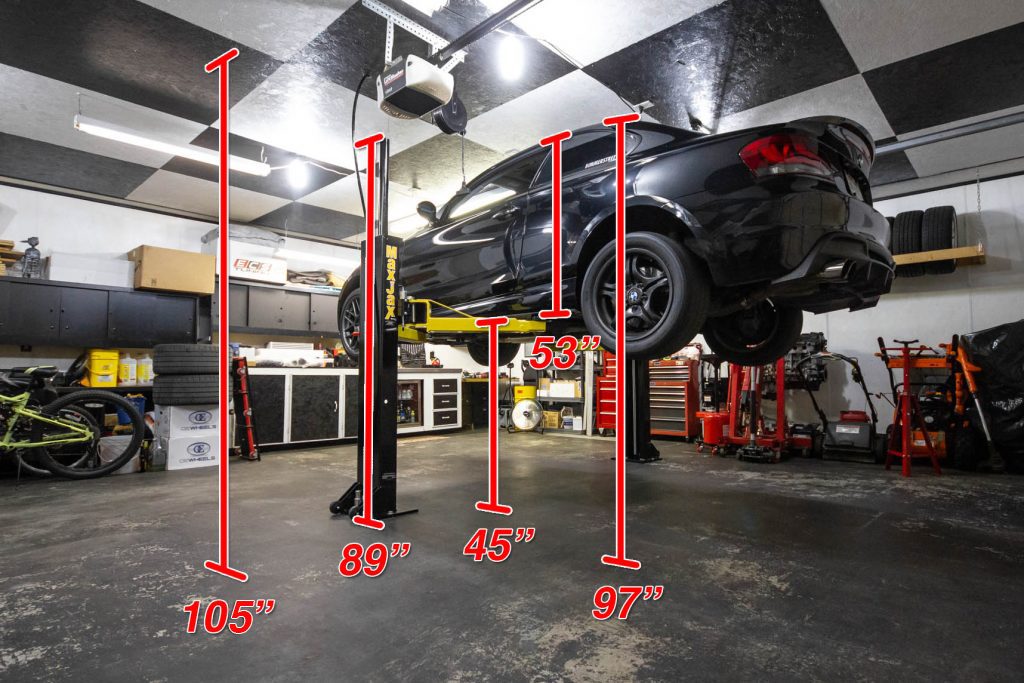
My BMW 135i is 52″ tall (from jack point to roof) and the MaxJax maximum lift height is 45″ (+3″ with included extenders). So my car is 97″ at its highest point, fitting comfortably within the 105″ ceiling height! If I want to lift a truck or SUV, I might not be able to raise it all the way up without the vehicle hitting my ceiling, depending on it’s overall height.
Standard MaxJax Features
- Low ceiling height friendly
- Regular 110v electrical plug (no 220v required)
- 6,000 lb. lifting capacity
- Semi-portable lift columns
- Adjustable base-plate width
- 4″ minimum concrete required
Additional Must-Have Lift Accessories
- Adjustable creeper (perfect height & positioning)
- Short oil drain tank (most are too tall)
- Short tripod stands (again, most are too tall)
If you have a vehicle with more ground clearance and higher ceilings, you can purchase additional 6″ lift risers in addition to the 3″ risers that are included. For those of you with two-wheel rides, there is a motorcycle adapter that makes wrenching on your bike much easier.
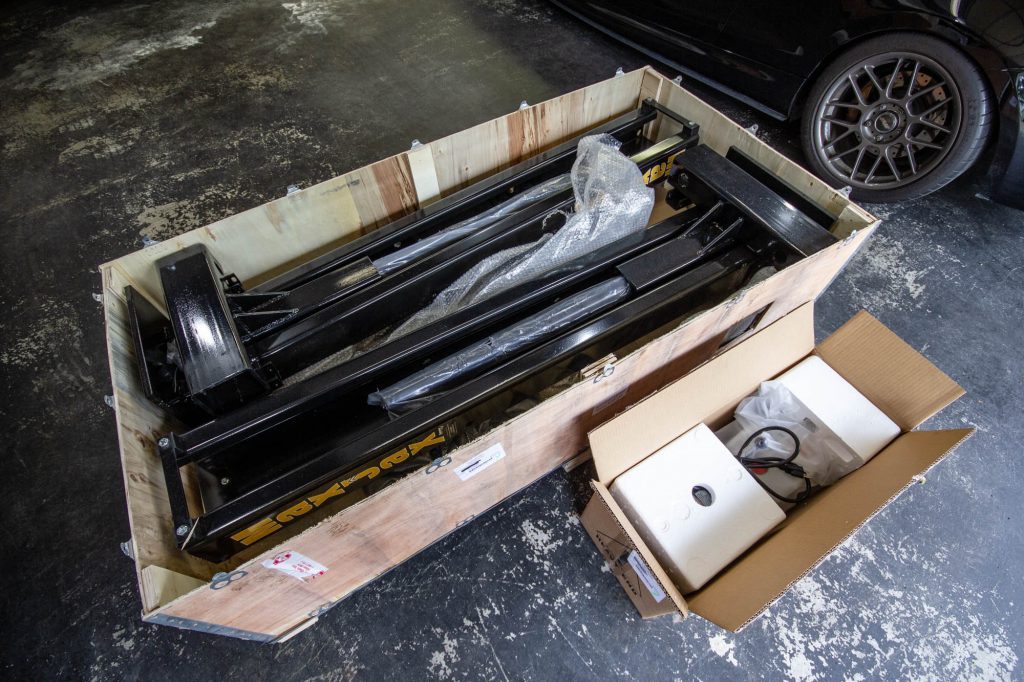
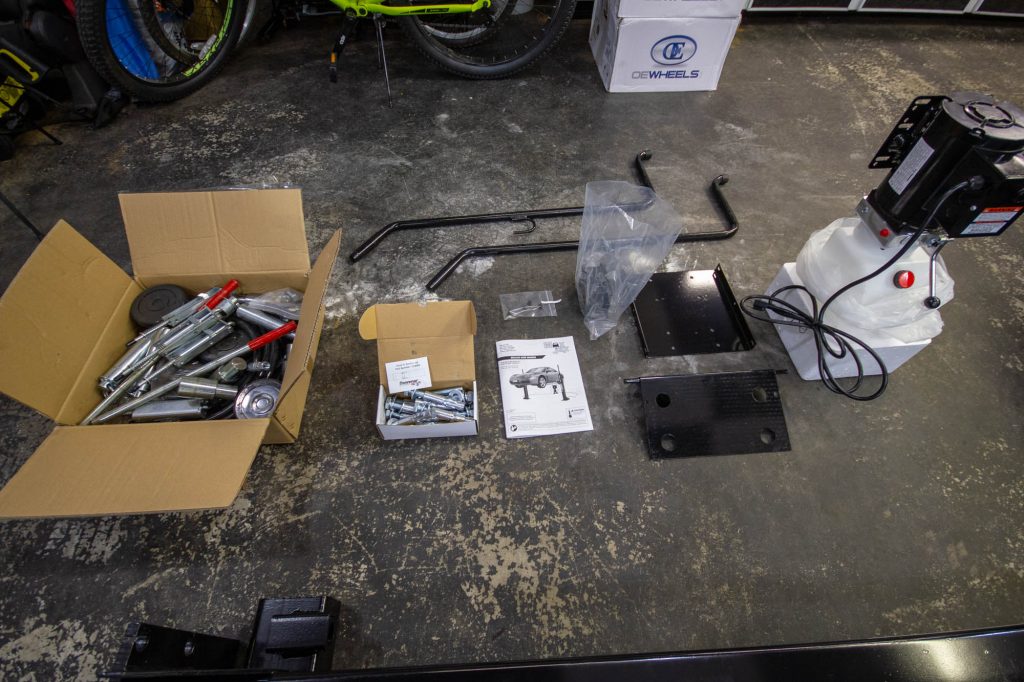
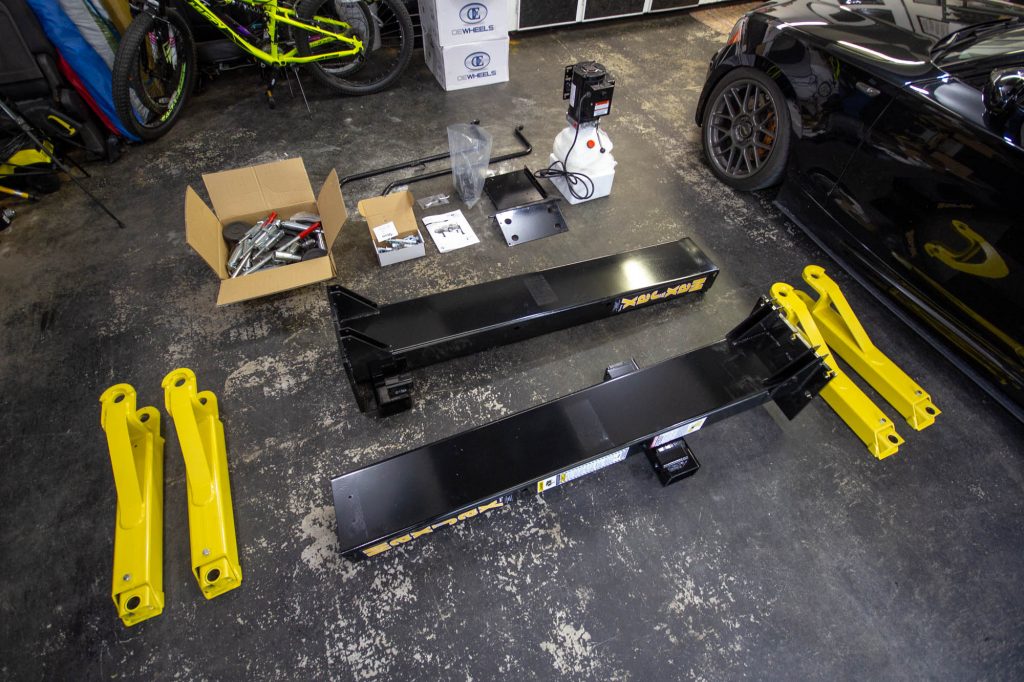
Installation Guide & Video
The installation guide that comes with the MaxJax system is pretty comprehensive, but I made an in-depth video showing you how to install the lift in your home garage. I also demonstrate how to route the hoses off the ground to keep the power cart out of the way. Watch it now:
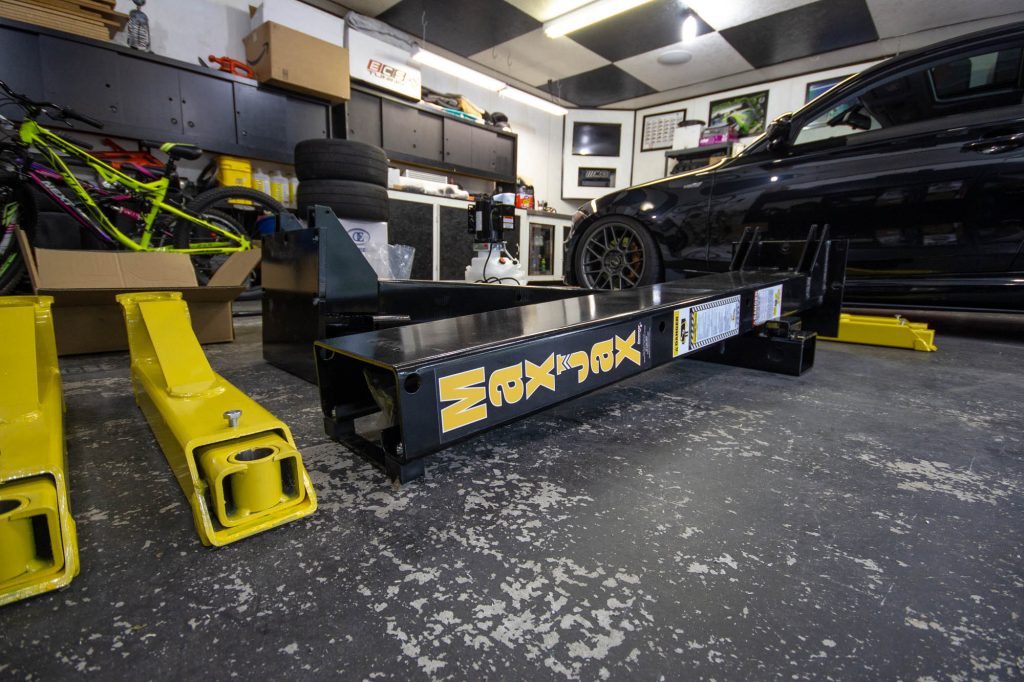
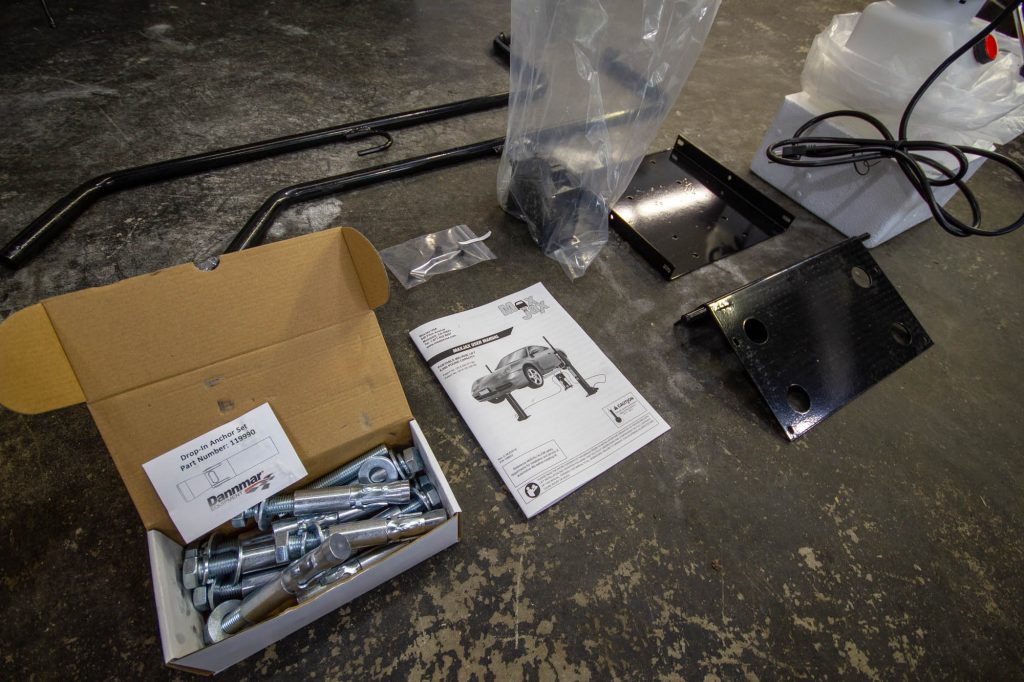
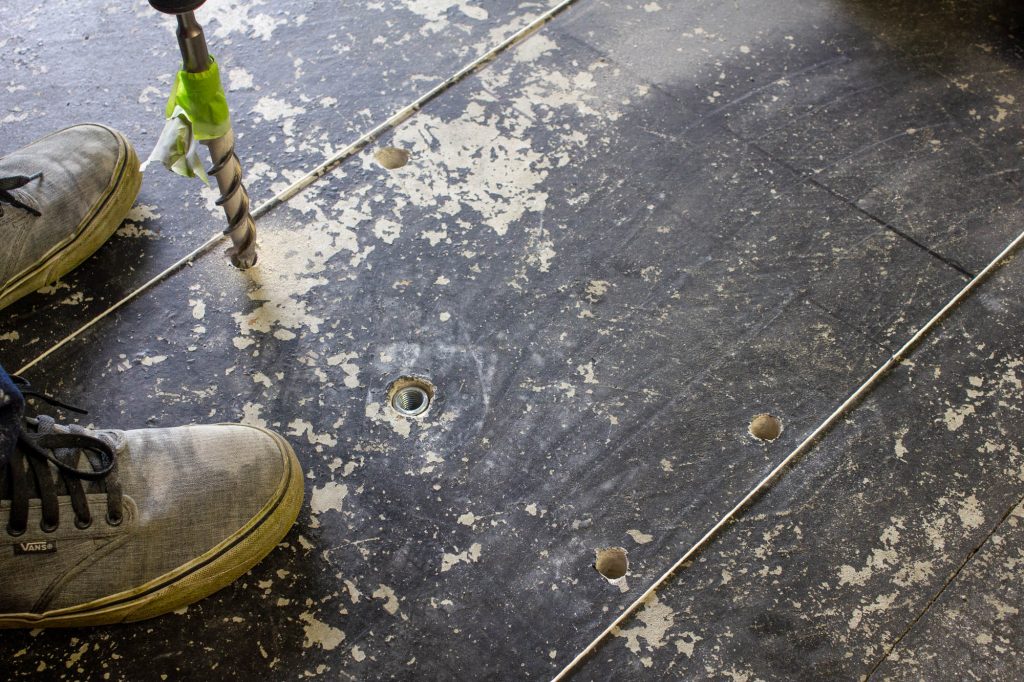
4″ of good concrete is required to install this lift. I used the standard anchors that are included with the kit, but some people prefer the epoxy anchors instead. I mounted the columns 125″ apart from each other, measured from the outside edge. This width has allowed me to lift multiple vehicles with various jacking points.
Tools Required
- Rotary hammer drill (to drill concrete)
- 5/8″ rotary hammer bit
- 7/8″ rotary hammer bit
- 24mm racheting wrench (to set anchors)
- Adjustable wrench
- 1/2″ torque wrench (for final torque)
- 24mm socket (for column bolts)
- Heavy-hitting hammer (to insert anchors)
- Laser level & square (to align columns)
- Chalk line (to align columns)
- Magnetic post level (to level columns)
- 25 ft. tape measure
- Misc. sockets, allen wrenches, screwdrivers

Materials Required
- Hydraulic fluid (2 gallons required)
- Teflon tape
- White lithium grease
- Masking tape
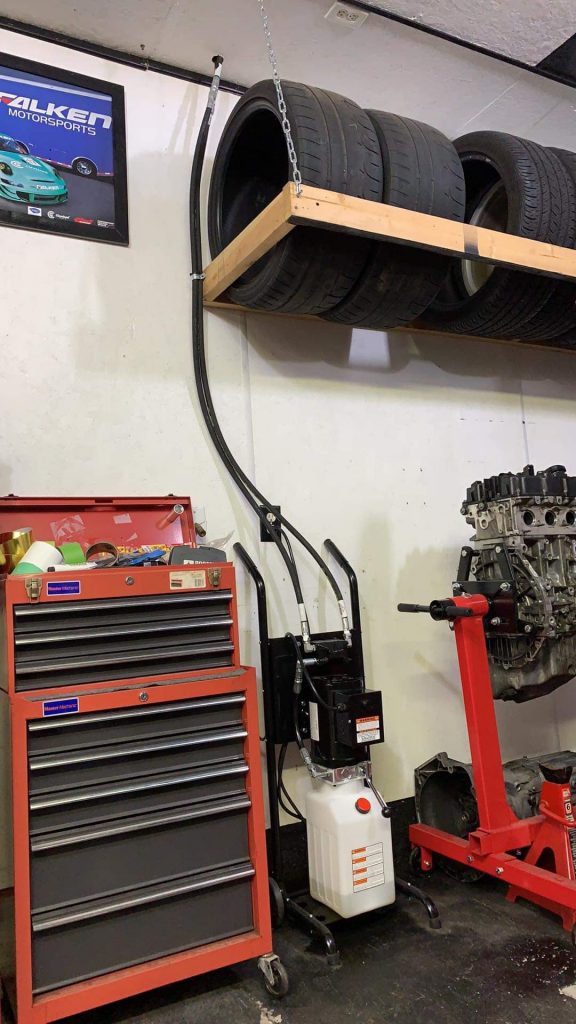
If you plan to mount the pump cart out of the way (like I did), you will most likely need to extend both hoses. The most cost-effective way to do this is to add a hose extension to the 178″ hoses that come with the MaxJax. I needed 17 ft. of additional hose for far column and 7 ft. of additional hose for the closer column. Measure how much additional hose you will need for your location and purchase accordingly.
- Hose extension fittings (one for each extension)
- 6 ft. extension hose
- 8 ft. extension hose
- 9 ft. extension hose
- 90° fittings for bottom of the posts (2 required)
- 90° fittings for pump connection (2 required)
Safety Equipment
Seriously, I skimped on this stuff and wish I wouldn’t have. Drilling into concrete is dusty, loud and rough.
MaxJax Review
Overall, I’m extremely happy with the MaxJax system. With the bikes out of the way, I can comfortably fit two cars in my garage. As you can see in the photos below, I swapped out the lower column 45° fittings for 90° fittings. This allowed me to run the hose straight up the column into the ceiling.

The adjustable creeper is perfect for working under the MaxJax, since it doesn’t lift high enough for you to stand under it. The short oil drain tank comes in very handy when changing oil or other fluids. I’ve used the short tripod stands when doing suspension work or to help support the car. It is the perfect lift for the at-home DIYer.
Since the standard MaxJax doesn’t have auto-locking cylinders, you must manually insert the bar stoppers as a safety measure. I’ve read that it’s safe to drill up to two additional mounting positions in the columns if you see fit, but I’ve been happy with the two standard stopping points so far. Otherwise Dannmar makes an upgraded M-6 unit that has auto-locking cylinders if you want to spend a little more.
If you have any questions, please leave a comment below and I will reply!
This page contains affiliate links. If you purchase anything using the links above, I will earn a small commission at no extra cost to you. Win-win!
A “how-to” on building your wall-mounted tire rack would be awesome. I plan to do something similar as I have my OEM rims (135i) my wifes E93 335i OEM rims and my race rims stacked on the floor again a wall. Your’s looks pretty simple so I being doing this in a few weeks.
Good idea, I should do something like that eventually. It’s basically some 2x4s, chain and some hooks. Pretty simple.
Great information. Thank you. Can you think of any situation in which you would have benefited from having a lift that extended to 72″ if your shop ceiling would have allowed it? I am building a outbuilding now and deciding on the height of the walls which I have designed at 12′ to allow for a full height lift.
Hi Stephen, if I had the ceiling that allowed a higher lift, I would’ve gone higher. Being able to stand under a lift would be a lot more convenient than using this MaxJax. The MaxJax is great, but it’s for people with limited ceiling height or those who need the portability.