How-To: Detail a Black Car with Paint Correction
This car has been in need of a good detail and I finally got around to doing it. First I washed it with Meguiar’s Gold Class Shampoo, then went over the whole car with their Clay Bar Kit. I was surprised at the amount of crap the claybar took off. Then I used a high-speed corded drill with a velcro attachment for cutting, polishing, and waxing.
I started with Meguiar’s Ultimate Compound on a 6″ foam cutting pad from Harbor Freight. After going over a body panel, I would let it dry and then wipe it off with a microfiber cloth. Next, I used Meguiar’s Polishing Compound on a 6″ polishing foam pad, again wiping it off with a microfiber towel once finished. The last step was applying Meguiar’s Black Wax with a 6″ foam finishing pad. Obviously wiping the excess off with a microfiber cloth.
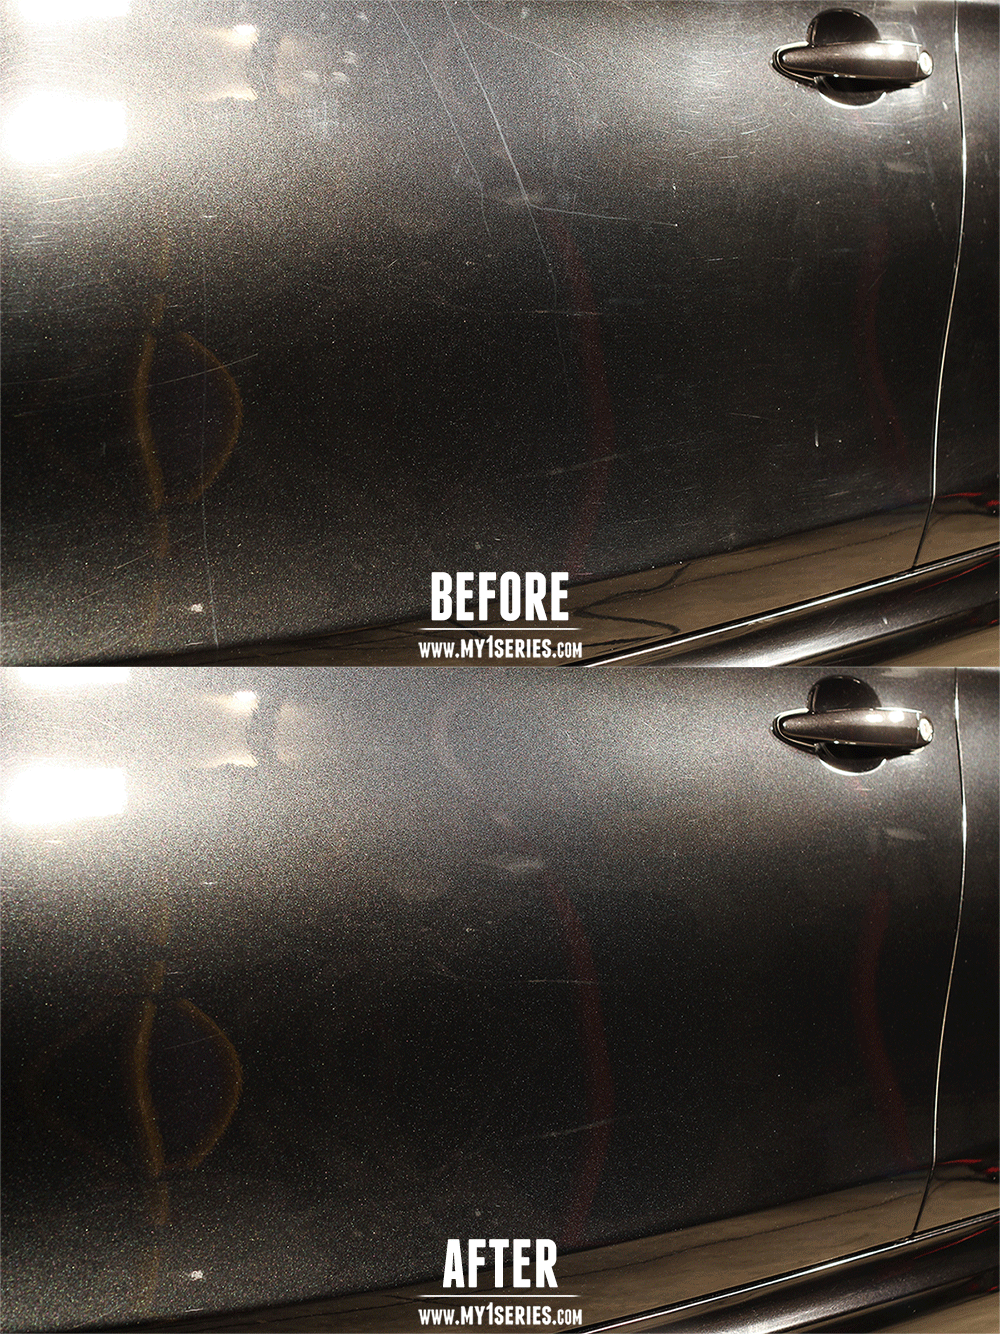
I took a picture before I started the cut/polish/wax process. Once I was finished, I took another picture to show the results. Keep in mind, the “before” picture is when the car was already washed and clean. The imperfections you see are all swirls or scratches, not dirt.
This animated GIF will switch between images. Click it for high-res.

In the two photos, you can see a lot of things in my garage reflecting off the paint. The two lines near the middle of the photos are power cords, not scratches. The lighter reflections above those are the power boxes on the light stands. All other bright imperfections are either lights on the ceiling, lights on the stands, or bright objects laying on the ground or on top of shelves. Obviously you can see the reflections of the yellow and red light stands themselves.
This was my first time doing any sort of paint-correction and I am very happy with the results. I briefly researched what products were best and read good things about the Meguiar’s line up and the Harbor Freight foam pads. Said and done, the whole process took about 10 hours. I even wetsanded a spot on the rear bumper to get rid of some weird hazing. I finished up by using trim restorer on the plastic grilles/diffuser, and tire shine on the tires. Well worth it to me.
I was able to remove about 95% of the imperfections from the paint with this process. The 5% of imperfections that remain are very hard to see unless you’re inspecting the car under harsh lighting. It just goes to show how awesome the car looks and feels now. Also, the photos capture the metallic flake. It is easy to see in person but hard to notice in most photos. Black Sapphire Metallic > Jet Black!
This page contains affiliate links. If you purchase anything using the links above, I will earn a small commission at no extra cost to you. Win-win!
I’m sure that as a result of lighting challenges the photo doesn’t represent the true improvements. That being said, the photo does show that your research and hard work paid off. The finish looks GREAT!
Thanks Barb!
love how it came out ! wanting to try it myself ! what drill attachment did you use to use the 6 in pads ? can’t seem to find it online.
Jose,
I bought the 6″ attachment on eBay. Couldn’t find any locally. Good luck!